Tuts Listed At
Saturday, July 6, 2013

This tutorial is for those that have a working knowledge of PSP and
was created using PSP version 9 however it may be created in other
versions as well.
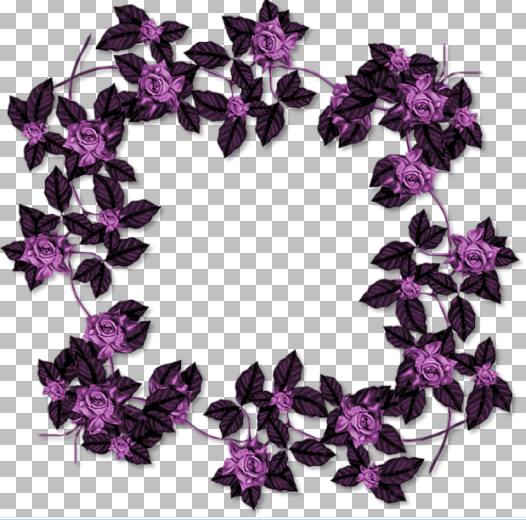
Tube used in this example is from the wonderful artist ©Pinup Toons which you must retain a license in order to use that can now be purchased HERE
Tube used in this example is from the wonderful artist ©Pinup Toons which you must retain a license in order to use that can now be purchased HERE
Materials Used
Scrap Kit byAmy Marie called "Purple Dreams" Which is a paid kit. You can obtain this kit from one of the following stores:
Scrap Kit byAmy Marie called "Purple Dreams" Which is a paid kit. You can obtain this kit from one of the following stores:
NOTES: Sharpen each element as you re size it and apply your favorite drop shadow as you work
*********************************************************************
Open a new transparent image 900x700 (will re size later)
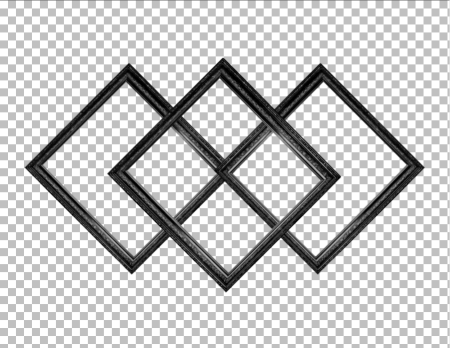
1. Open element25 (black frame). Copy and paste as a new layer onto your working canvas. Rotate free 45°. Duplicate and place over the first frame as in my preview below. Layers-arrange-move down. Duplicate, image mirror. Layers-merge down. High light your top layer (center frame). Select the center with your magic wand. Selections-modify-expand by 5 pixels. High light your bottom layer (the two side frames) press the delete key. Select none. Layers-merge all-visible.
2. Using your magic want select the area in the center of your left frame then while holding your shift key click in the center of the two remaining frames. Selections-modify-expand 5 pixels. Open pp014. Copy and paste as a new layer onto your working canvas. Selections-invert. Then making sure you are on the paper layer that you just applied press the delete key. Select none. Plugins-Adjust-Variations and press the lighter button 3 times.
3. High light the top layer and open element1. Copy and paste as a new layer onto your working canvas. Image flip and re size 80% and arrange over the lower left frame. Using the eraser tool, erase the entire stem of the leaves. Duplicate-image-mirror. Layers merge down.
4. Open element 60, Copy and paste as a new layer onto your working canvas. Rotate free to the left 45°. Arrange over the center and left frame. Duplicate-image-mirror, layers merge down. Using the selection tool, select the top portion of the ribbon and press the delete key. Select none.

5. High light the top layer. Open element74. (Do Not close it out). Copy and paste as a new layer onto your working canvas. Re size 50% and rotate free 45° to the left. Arrange over the lower left corner of left frame. Duplicate, image mirror. Go back to your element74. Copy and paste as a new layer onto your working canvas. Re size 50% and this time rotate free 45° to the right. arrange over the right frame above the previous roses. Duplicate-image-mirror. Layers merge down 3x.
6. High light the top layer. Open element39. Copy and paste as a new layer onto your working canvas. Re size 35% and rotate free 45° to the left. and arrange in the center left of the roses you just placed. Duplicate-image-mirror. Layers merge down.
7. High light the top layer and open element6. Copy and paste as a new layer onto your working canvas. Re size 50% and arrange between the lower center and right frame. Image-duplicate-mirror. Layers-merge down.
8. High light the top layer and open element79. Copy and paste as a new layer onto your working canvas. Re size 80%, rotate free 45° to the right and arrange in the lower right of the center frame, image-duplicate-image mirror. Layers merge down.
9. High light the top layer and open element78. Copy and paste as a new layer onto your working canvas. Re size 50% and arrange in the lower right of the tag.
10. Making sure your top layer is high lighted open element45. Copy and paste as a new layer onto your working canvas. Re size 15% and arrange over the purple leaves as in my tag preview, duplicate and arrange again as in my preview. Layers merge down, Image-duplicate mirror. Layers merge down.

11. High light the top layer and open element36. Copy and paste as a new layer onto your working canvas. Re size 50% and arrange over the lower center of the center frame and flowers as you see in my tag.
12. High light the paper layer. Open a tube of choice or the one that I am using. Copy and paste as a new layer onto your working canvas. Re size as needed and arrange to liking. Once satisfied. Duplicate your tube then go to layers-arrange- bring to top. Using your selection tool, select the body which will stick out of the frame. You want it to look as if she is coming out of the frame. Once you have the area selected that you want removed press your delete key and select none.
13. High light your top (tube layer). Open element63. Copy and paste as a new layer onto your working canvas. Image-flip and rotate free 45° to the left and then arrange in the upper left of your tag as in my tag. Duplicate-image mirror. Layers-merge down, duplicate image flip. You now want to move this entire layer down below the frame but above the paper layer.
14. High light your paper layer. Open element87. Copy and paste as a new layer onto your working canvas. Resize 90%, and arrange to your liking on the right side of your tag. Once happy with the placement, duplicate, image mirror. Layers merge down.
15. High light your frame layer and with your magic wand select the center of each one, selections, modify expand by 5 pixels, now high light your sparkle layer, selections, invert and press your delete key. Select none.
16. Once you are completely satisfied with the way your tag looks, Layers merge all visible. Re size to your liking. Make sure you sharpen at this point. Now duplicate and high light your bottom (original layer). Adjust-blur-Gaussian blur 20.00 and hit ok, now go to effects, texture effects, blinds with the following settings. Width = 3, Opacity = 60, Color = #310F3A. Horizontal and light from left/top both left unchecked. Hit apply button.
17. High light your top layer and open element91. Copy and paste as a new layer onto your working canvas. Re size 80% and arrange in the upper left of your tag as you see in mine. Duplicate, image mirror, layers merge down. Duplicate, image flip. Layers merge down. Move this layer below your tag and above the blurred/textured layer.
18. High light your top layer and open element88. Copy and paste as a new layer onto your working canvas and place it over the lower portion of your tag to your liking.
Once you are satisfied with the way your tag looks merge all your layers visible, re size to liking and add your name and © and export as your favorite image format.
I hope you enjoyed doing this tutorial and if you have any problems please do not hesitate to contact me and I will do all I can to help you get your tag completed.
Have a fantastic Day/Night
Angel Wolf
Tuesday, April 30, 2013

This tutorial is for those that have a working knowledge of PSP and
was created using PSP version 9 however it may be created in other
versions as well.
Tube used in this example is from the wonderful artist ©Very Many which you must retain a license in order to use that can now be purchased HERE
Tube used in this example is from the wonderful artist ©Very Many which you must retain a license in order to use that can now be purchased HERE
Materials Used
Scrap Kit byAmy Marie called "Mama's & Daughter" Which is a paid kit. You can obtain this kit from one of the following stores:
Scrap Kit byAmy Marie called "Mama's & Daughter" Which is a paid kit. You can obtain this kit from one of the following stores:
Mask Used HERE
Font Used: Sacramento
NOTES: Add your favorite Drop Shadow as you work and sharpen each element as you re size it
*******************************************************
We will begin by working on the right side of the frame, then work on the left side.
1. Open a new transparent image 800x800. Open element91, re size 90%. Copy and paste as a new layer onto your working tag. Open element85, copy and paste as a new layer onto your working tag. High light your top, frame layer and with the magic wand select the center of your frame. Selections-modify expand 5 pixels. Open pp2, copy and paste as a new layer onto your working tag. Layers-arrange-move down. Selections, invert and press your delete key. Deselect.
We will begin working on the right side of the frame now.
2. Open element51, re size 50%, copy and paste as a new layer onto your working tag, place in the upper left as in my tag. Duplicate this layer, image mirror, duplicate once more, image flip, duplicate one last time, image mirror. Layers merge down 3 times.
3. Open element59, re size 80%, copy and paste as a new layer onto your working tag and place it on the right side over the leaves, with your free hand tool select the bottom leaf and the press your delete key. (we want the bottom part of this element gone thus selecting with the free hand tool. Duplicate, image flip. Layers merge down, duplicate image mirror.
4. High light the frame layer. Open element24, re size 40%, copy and paste as a new layer onto your working tag. arrange in the upper right as in my tag, duplicate image mirror. We want the flowers looking like they are poking out. Layers merge down.
5. High light your first leaf layer (from step 3). Open element17, re size 30%, copy and paste onto your working tag. place in the upper right as in my tag. Duplicate this layer, image mirror and arrange again as in my tag. (Or to your liking).
6. High light your top layer. Open element23, copy and paste as a new layer onto your working tag, place in the lower right. Open element36, re size 60%, copy and paste as a new layer onto your working tag and arrange it next to the vase of flowers just placed, Open element35, re size25%, copy and paste as a new layer onto your working tag and place it over the previous bottle.
7. High light the vase of flowers layer, open element73, re size 65%, copy and paste as a new layer onto your working tag and place it around the bottles and vase of flowers, then using your eraser tool set to approximately size 20 and using the below image as a guide erase parts of the pearls to make it look as if it is wrapped around the objects. (you may need to zoom in to see better).
Click the Image to see a larger size

8. High light your very bottom layer. Open element14, copy and paste as a new layer onto your working tag. Image-rotate-rotate free 30 degrees to the right and arrange as in my tag.
9. High light your very bottom layer. Open element22, re size 90% , copy and paste as a new layer onto your working tag. Image- mirror. place in the upper right as in my tag (keep it under the leaves) duplicate and pull the duplicate down and to the left a little or to your liking.
10. High light your top layer. Open element2, re size 30%, copy and paste as a new layer onto your working tag, image mirror and place in the upper right again as in my tag.
WE ARE NOW GOING TO WORK ON THE LEFT SIDE
**************************************************
11. High light the second layer of leaves that you placed (or if said better the top layer of leaves, the ones that look like ivy leaves). Open element92, copy and past as a new layer onto your working tag, image-rotate-rotate free 30 degrees to the left. Place in the upper left as in my tag then using the eraser tool you want to erase the stem from about mid way of the leaves. Duplicate image mirror and place a bit below and to the right of the first dandelion element.
12. High light the top layer. Open element33 or 34 (your choice) re size 40%. copy and paste as a new layer onto your working tag and place over the steps of the dandelion looking elements you just placed.
13.High light the purple and white flower layers in the upper left, Duplicate this layer then image flip. Re size 90% and arrange to your liking or as I did in my tag,
14. High light the first dandelion looking element, open element99, copy and paste as a new layer onto your working image and place to your liking or as I did in my tag.
15. High light your pearls layer, Open element102, re size 80%, copy and paste as a new layer onto your working tag. place on the bottom of the frame as I have in my tag.
16. High light your top layer. Open element19, re size 60%, copy and paste as a new layer onto your working tag, place on the lower left. Open element47, re size 35% copy and paste as a new layer onto your working tag, image mirror and place over the gloves.
17. High light your frame layer. using your magic want select the center of your frame, Selections , modify expand 5 pixels. Now high light the paper layer and open element100, copy and paste as a new layer onto your working tag. Place this element to your liking and then duplicate it and place it again to your liking. I kind of covered my paper so that it had some sparkle to it. Once happy with how these look layers. merge down the press your delete key to remove any excess outside of the frame. Deselect.
18. Highlight your very bottom layer. Open element6, copy and paste as a new layer onto your working tag and place in the lower center of your frame as in my tag.
19. High light your top layer, Open the tube of choice, re size as needed and copy and paste as a new layer, Duplicate this layer and move it down below the frame layer. Again high light your top tube layer then using your free hand tool select the part of your tube that extends outside of the frame and press your delete key. Deselect. Now high light the bottom (duplicated tube) again using your freehand tool select any area that extends outside the frame and press delete. Our objective is to make your tube look as if she is leaning out of the frame.
21. Apply any kind of background effect that you would like, your favorite mask
If you want to add more elements by all means do so. This is your tag so it is encouraged to make it to your own liking. My tutorial is simply a learning tool :)
21. Once you are satisfied with how your tag looks, merge all your layers visible. High light your bottom layer then open the mask image I supplied or one of your choice. Open Paper of choice, Copy and paste as a new layer. re size (all layers UNCHECKED) 80%, Layers, new mask layer, choose the mask and apply. Layers-merge-merge group. Layers merge visible.
Add your name and copyright and export as your favorite image format.
Thank you for trying my tutorial. I hope you have enjoyed doing it. If
you have any trouble of any kind please do not hesitate to CONTACT ME. I
would also love to see any of your results and will share on my blog.
Hugs
Angel Wolf
Thursday, February 28, 2013

This tutorial is for those that have a working knowledge of PSP and
was created using PSP version 9 however it may be created in other
versions as well.
Tube used in this example is from the wonderful artist ©Keith Garvey which you must retain a license in order to use that can now be purchased HERE
I also used a mask that I am not sure who the owner is so if it is yours please let me know so that I can give credit to you for it. You can download the mask HERE
When creating this image I used elements from several of the collaboration kit contributors.
Materials Used
Scrap Kit CDO St Patricks Collaboration Kit Which can be received free for just purchasing 2 scrap kits from the store. Only Available until February 28, 2013.
Materials Used
Scrap Kit CDO St Patricks Collaboration Kit Which can be received free for just purchasing 2 scrap kits from the store. Only Available until February 28, 2013.
See CDO Store for more details
Font Used: Gasoline Ally NF
***********************************************
Lets Get Started
Open a new image 750x750, we will re-size it later. You may refer to my tag for placement reference.
You will be adding your favorite drop shadow as you work or if you wish to do so at the end that is fine as well.
Open a new image 750x750, we will re-size it later. You may refer to my tag for placement reference.
You will be adding your favorite drop shadow as you work or if you wish to do so at the end that is fine as well.
1. From Foxy, open Frame1. Re-size 65%, adjust sharpen. Copy and paste as a new layer onto your blank canvas.
2. With your magic wand click in the center of the frame to select it. Selections, modify and expand selection by 5 pixels. From LML open paper4 or one of your choosing, re-size 60%, image, mirror. Copy and paste as a new layer onto your working canvas. Layers, arrange, move down. Selections, invert and press your delete key. De select.
3. Make your top layer active. From Dee's Design Depot open element5. Resize 80%. Copy and paste as a new layer onto your working canvas. Arrange this item to the upper right of your frame. Duplicate this layer, image, mirror. Layers, merge down. Duplicate this layer. Image, flip, once again layers, merge down. Now you want it below the frame so, Layers, arrange Move to bottom.
4. Make your top layer active. From Dee's Design Depot, open element 15. Re-size 70%. Copy and paste as a new layer onto your working canvas, arrange it to the upper right of your frame to your liking. Duplicate this layer, image, mirror. layers, merge down. Duplicate this layer, image, flip.
5. From Baby Cakes, open element16. Re-size 40%, copy and paste as a new layer onto your working canvas and arrange it in the upper left over the previous flowers but let the previous flowers peek out some. Duplicate this layer, image, mirror, layers merge down.
6. From Baby Cakes, open element17, re-size 60%. Copy and paste as a new layer onto your working canvas and place it on the center right of your frame. Duplicate this layer, image, mirror, layers, merge down.
7. From Dee's Design Depot, Open element8, re-size 40%. Copy and paste as a new layer onto your working canvas then place it in the top center.
8. High light your frame layer. From Foxys, open element13, re-size 85%. Copy and paste as a new layer onto your working canvas. Image flip then arrange it near the bottom of the frame to your liking. Duplicate this layer, image mirror, and arrange near the top of your frame to your liking. Layers merge down.
9. Make your top layer active. From Schnegge, ope element14, re-size 60%. Copy and paste as a new layer onto your working canvas and arrange in the upper right to your liking. Duplicate this layer, image mirror, layers merge down. Again duplicate this layer, image, flip. Layers merge down. Layers, arrange, move to bottom then layers move up.
10. Activate your frame layer and using your magic wand click in the center to select it. Open your close up tube you are using, Re-size appropriately. Now activate your paper layer under the frame layer then copy and paste your close up as a new layer onto your working canvas and arrange to your liking. Once satisfied, selections, invert and press your delete key to remove any excess of the image that may be sticking outside the frame and deselect. You now need to lower the opacity of the close up tube to 60%. Layers, merge down. Image, effects, texture effects, blinds with the following settings.
Width=4, Opacity=15, color=white, horizontal and light from left/top unchecked.
11. Activate your top layer. From LHD open element1, re-size 40%. Copy and paste as a new layer onto your working canvas.Image, mirror then place in the lower right of your tag.
12. Again make sure your top layer is active, From LML open element3, resize 25% , Copy and paste as a new layer onto your working canvas and arrange it to the lower right (as in my tag). Duplicate this layer, image, resize 90%. Arrange a little down and to the left of the first glass. Duplicate this layer, image, mirror, arrange this layer a little down and to the right of the second glass. Layer, merge down 2 times.
13. Making sure your top layer is again active, From Dee's Design Depot, open element12. Re-size 30%. Copy and paste as a new layer onto your working canvas and arrange around your glasses. Duplicate and arrange as many times as desired. I used the element 4 times, once satisfied, merge all your coin layers together.
14. Activate your top layer. From Schnegge open element5, re-size 40%. Copy and paste as a new layer onto your working canvas. Image, mirror, image, rotate free 30 degrees to the left. Arrange the butterfly in the upper left of your tag (as in mine or to your liking). Duplicate this layer, image, re-size 80%, image mirror and arrange to the left just above the glasses of beer.
15. Open Your main tube you are using. Re-size to your liking. Copy and paste as a new layer onto your working canvas and place it to your liking. Once you are completely satisfied with the way your tag looks, merge all layers visible. (Be sure you have added your drop shadow to all elements before merging).
16. You should now only have one layer. Duplicate this layer. Activate your bottom layer. Adjust, blur, Gaussian blur=30.00 and accept. Now Effects, texture effects, blinds with the following settings:
Width-4, Opacity=50, color=white, Horizontal and light from left/top both unchecked. Layers merge visible.
17. From BCS open paper1 (or you can choose a paper from any of the contributors you wish), Copy and paste that paper as a new layer onto your working canvas. Layers, arrange, move to bottom. Image re-size 75%. Open your mask image I supplied above, Layers, new mask from image and choose the 1zbbukg image, source luminance and make sure to un check invert mask data and apply. Layers, merge group. Lower the opacity of this mask layer to around 50%. Layers, merge all visible.
18. Apply your © and your name and export as your favorite image format
Thank you for trying my tutorial. I hope you have enjoyed doing it. If you have any trouble of any kind please do not hesitate to contact me. I would also love to see any of your results and will share on my blog.
Hugs
Angel Wolf
Tuesday, February 26, 2013

This tutorial is for those that have a working knowledge of PSP and was created using PSP version 9 however it may be created in other versions as well.
Tube used in this example is from the wonderful artist ©Eugene Rzhevskii which you must retain a license in order to use that can now be purchased HERE
Tube used in this example is from the wonderful artist ©Eugene Rzhevskii which you must retain a license in order to use that can now be purchased HERE
.
Materials Used
Scrap Kit byTamie-Addictive Pleasures "Lucky Emerald" Which is a paid kit. You obtain this kit from her store at Dreams N Digital
Materials Used
Scrap Kit byTamie-Addictive Pleasures "Lucky Emerald" Which is a paid kit. You obtain this kit from her store at Dreams N Digital
Font Used: MrsVonEckley
***********************************************
Lets Get Started
** Apply your favorite drop shadow as you work**
** Apply your favorite drop shadow as you work**
1. Open a new image 750x750 with a transparent background (we will re size later).
2. Open ele21, copy and paste as a new layer onto your working image, Click in the center of the frame and expand 25 pixels. Open pp11, re-size 50%, copy and paste as a new layer, invert, press your delete button, deselect and move the layer below your frame.
3. High light the bottom layer and then open ele3, re-size 80%, sharpen and arrange in the upper right side of the frame. Duplicate and mirror. Layers merge down, Duplicate, flip and move up a little.
4. Open ele19, resize 50% , Copy and paste as a new layer and arrange in the upper center. Drag layer below frame and paper but above the doodles, duplicate, mirror. Layers Merge down. Duplicate, Image rotate and rotate 90 degrees to the right. Duplicate once again and mirror. Layers merge down 2 times.
5.Open ele50. Copy and paste as a new layer. No need to move re size or anything it stays right where it is at.
6. High light the top layer, Open ele37, re-size 45%, image sharpen, image rotate free 30 degrees to the right. arrange in the upper left to your liking (see my tag for placement). Drag this layer down below your flower frame, duplicate, image mirror.
7. Open ele22, re-size 40%, sharpen. Copy and paste as a new layer and arrange in the lower right of your tag.
8. Open ele11, re-size 40%, copy and paste as a new layer in the top center.
9. open your tube and re-size and arrange to your liking.
10. Open ele49, re-size 45%, copy and paste as a new layer and drag below your pot of gold. Duplicate, mirror arrange to liking, duplicate again and arrange to liking.
11. Layers merge all visible. Duplicate. High light your bottom layer.Adjust, blur, Gaussian blur Radius= 30.00 and apply. Image, effects, texture effects, blinds, Width=4, Opacity=40, Color=white, Horizontal unchecked, Light from left/top checked. Apply. Layers, merge visible.
Apply your name and copyright and export as your favorite image format.
If you have any problems with this tutorial please do not hesitate to let me know.
Friday, August 19, 2011

This tutorial is for those that have a working knowledge of PSP and was created using PSP version 9 however it may be created in other versions as well.
Tube used in this example is from the wonderful artist ©Mitsticheskaya which you must retain a license in order to use that can now be purchased HERE
Tube used in this example is from the wonderful artist ©Mitsticheskaya which you must retain a license in order to use that can now be purchased HERE
.
Materials Used
Scrap Kit byTamie-Addictive Pleasures "Black Rose" Which is a paid kit. You obtain this kit from her store at Dreams N Digital
Materials Used
Scrap Kit byTamie-Addictive Pleasures "Black Rose" Which is a paid kit. You obtain this kit from her store at Dreams N Digital
Plugin: Xero-Porcelain
Mask Used: WSL_Mask4 Here
Mask Used: WSL_Mask4 Here
Font Used: PrimroseJF
***********************************************
Lets Get Started
Open a new image 750x750 with a transparent background (we will re size later).
1. Open leaves, mirror and resize 90%. Copy and paste as a new layer onto your new canvas. move the leaves over to the right side (we are going to be building a frame out of them). Duplicate your leaves mirror then flip. Duplicate the leaves again and this time rotate 90° to the left, flip and put it at the top of the other leaves. Layers, move down 2 times. Duplicate, flip then mirror. Arrange all leaves layers as in my preview below. Once satisfied, Layers, Merge visible.
2. Adjust, hue/saturation/ colorize- Hue= 215, Saturation= 90. Image re size (all layers unchecked) 85%. Arrange to the upper right of your canvas.

2. Adjust, hue/saturation/ colorize- Hue= 215, Saturation= 90. Image re size (all layers unchecked) 85%. Arrange to the upper right of your canvas.
3. Choose your selection tool set at point to point. Select around the frame as in the preview below. High light the bottom layer. Open up Paper P8, or one of your liking, Copy and paste as a new layer onto your tag image. Ctl+Shift+I (to invert), Press your delete key. Selections Load/Save and save this selection to the alpha channel. Deselect.

4. Open the tube of your choice (if using the same one I am do not resize). Copy and paste as a new layer onto your tag and arrange her inside the frame. Once satisfied Load your saved selection then press the delete key. Deselect, Plugins/xero/porcelain using default settings.
***This part is going to take a little time to tweak to get just the right look. You can follow my instructions below or you can go your own way. Have fun with it :)
5. Open your main tube again and resize to liking (I resized 45%). arrange to the lower left of your tag as in my tag. High light the layer below your tube. Now open the cherry blossom element. Copy and paste as a new layer. Re size 70% arrange under your main tube so that the girls hand looks as if it is on the stem. Once happy with the position, Duplicate the cherry blossom element and move it to the right so that it looks as if the girl is sitting on a limb. Once satisfied, layers merge and merge down (just the 2 blossom layers are to be merged). Layers duplicate mirror and arrange to liking then merge your layers down once more.
6. Making sure that you are on your cherry blossom layer, open the cat element. Copy and paste as a new layer and re size 55% and arrange under the feet of your tube or to liking.
7. High light your very top layer. Open the chain element and copy and paste as a new layer onto your tag image. Mirror and re size 70% arrange in the upper right as you see it in my tag.
8.Open the teddy element, copy and paste as a new layer onto your tag image, re size 50% and arrange to your liking.
9. High light your bottom layer then go to image, canvas size and change the width to 800 and height to 850, centered. (Dont worry we will resize later). Open Paper P5 or paper of choice. If using the same paper as I am go to Adjust, hue and saturation and change settings = Hue= 180, Saturation= 80. Layers, new mask layer, WSL_mask4, invert unchecked, apply. Layers, merge, merge group. Resize 70% and arrange in the upper right. Duplicate, image mirror, arrange to liking. Layers merge down. Duplicate, Image-flip and push it up some. When you are satisfied with the look Merge down and sharpen once.
10. Open the decor element and re size 95%. Copy and paste as a new layer onto your tag image. Arrange in the upper right of your tag (see mine for reference). Move this layer down so that it is on top of the mask layer but below all other layers, duplicate, image mirror. Layers , merge down, Duplicate, image flip and move it up some. Once satisfied, layers, merge, merge down.
11. High light your rose frame layer, Open the sparkles element and copy and paste as a new layer, move it to the top to your liking. Duplicate and then flip and move down a little.
12. High light your very top layer, Open the Butterfly element. Resize to liking and place in various different areas of your tag. Add your favorite drop shadow to all of your layers excluding the mask and sparkles layer.
13. Once you are satisfied with the look of your tag, add your name and copyright information and export as your favorite image format.
If you have any problems with this tutorial please let me Know and I will help as soon as I can
Thank you for trying my tutorial. I hope you have enjoyed doing it.
Hugs
Angel Wolf
Subscribe to:
Posts
(Atom)
I Create For:
Blogroll
-
Easter Elegance- CT for Starlite and Soul - •♦• •♦• •♦• •♦• •♦• •♦• •♦• • ****CT for Starlite and Soul**** Kit Name: Easter Elegance Artist: AI Generated tube by Starlite and Soul Where to st...
 1 month ago
 -
NEW MOTHERS DAY COLLAB - CHILDHOOD BLESSINGS - WE HAVE COME TOGETHER AGAIN TO BRING YOU THIS LOVELY MOTHERS DAY THEMED COLLAB- YOU WILL $AVE BUY PURCHASING THE COMPLETE COLLAB - HERE OR YOU CAN PUR...
 3 years ago
 -
6th Annual Halloween Candies Freebie BlogTrain 2018 - You can get all the beautiful parts of this train here: https://madmimi.com/p/efd22d You can get my part here! https://www.dropbox.com/s/ndrao7pwthm...
 5 years ago
 -
-
New Freebie Kit - For The Love Of Autumn - *Hi All New kit For you!! For The Love Of Autumn.. I hope you like it tons of gorgeous elements vibrant Autumn colors, cute fall critters and all things f...7 years ago
-
CU BEAR IN THE CUP SCRIPT AND TEMPLATE - *AVAILABLE IN THE STORES* [image: post signature]
 8 years ago
